|
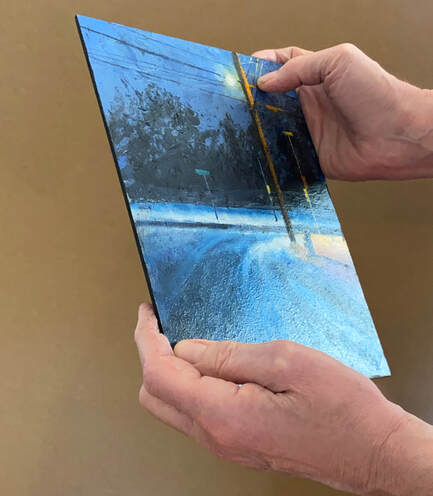
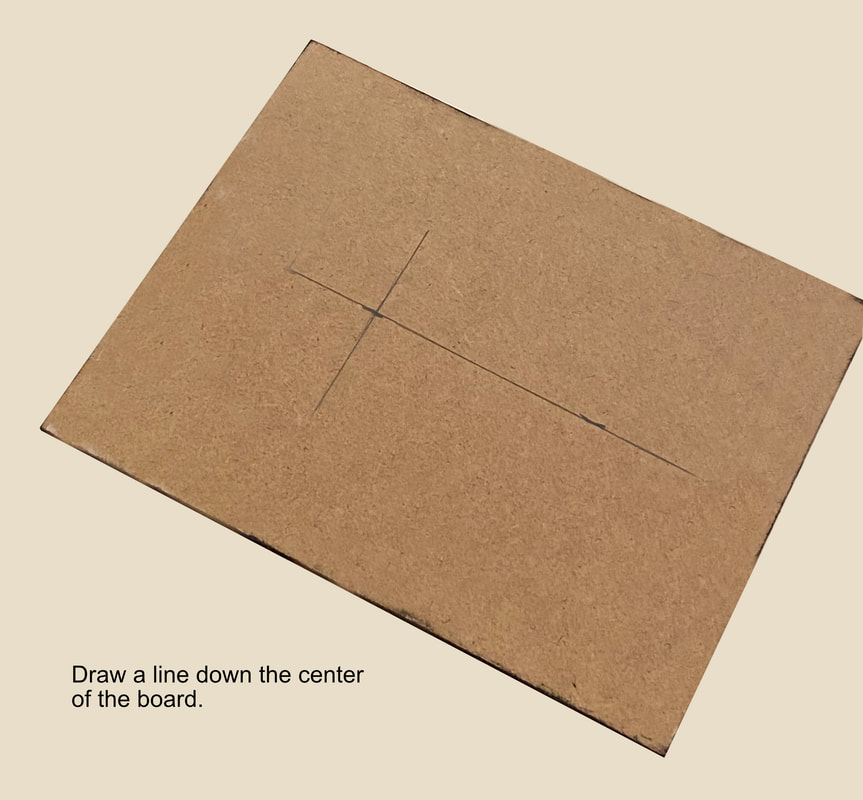
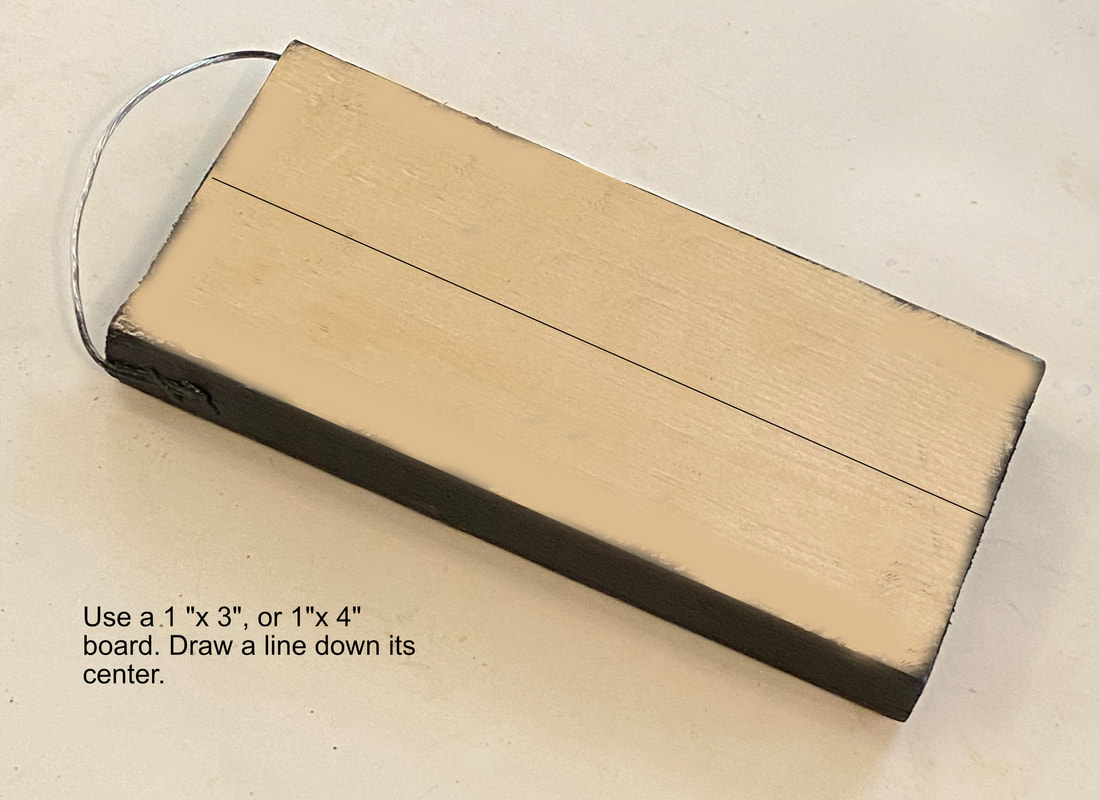
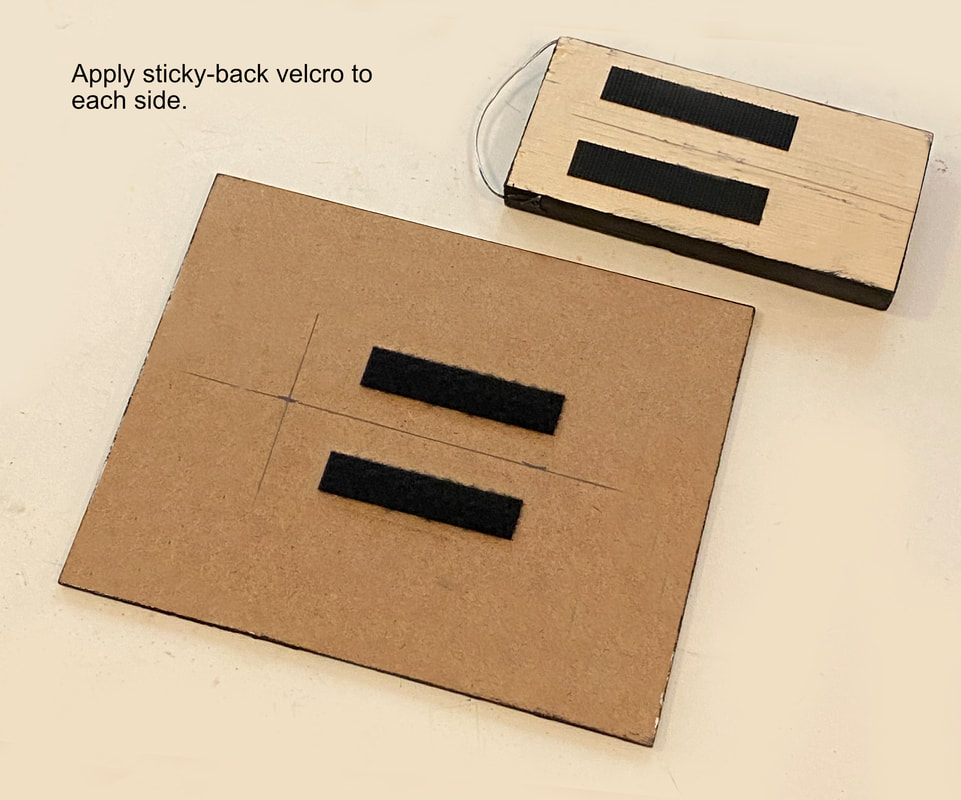
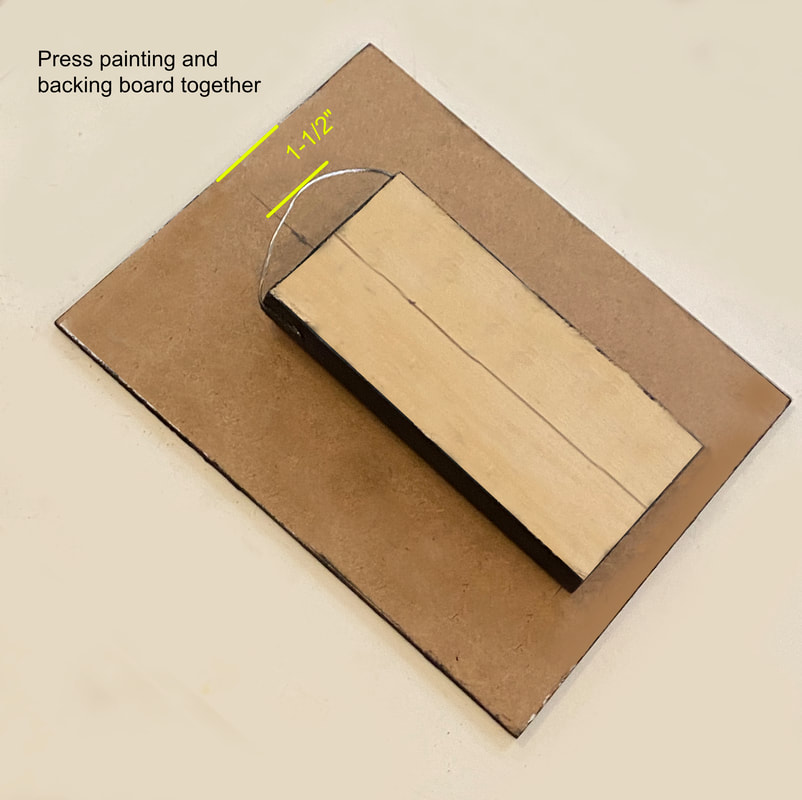
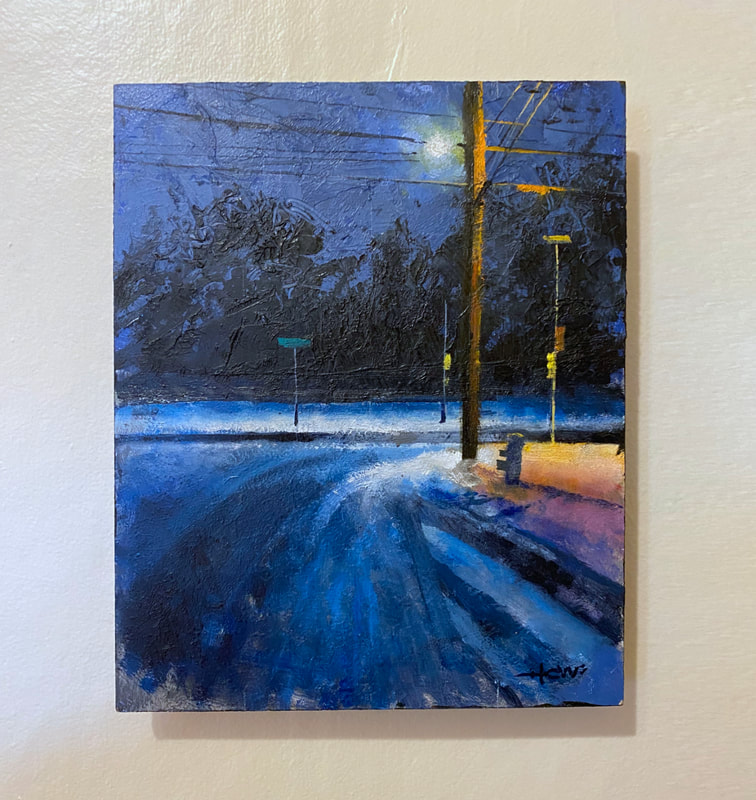
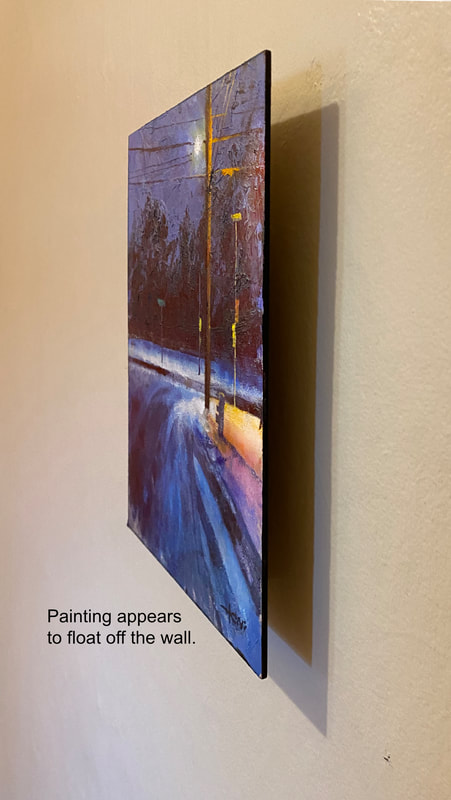
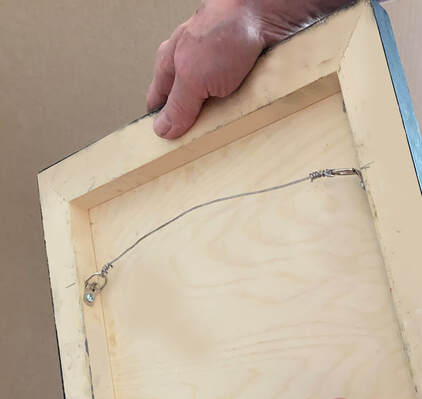
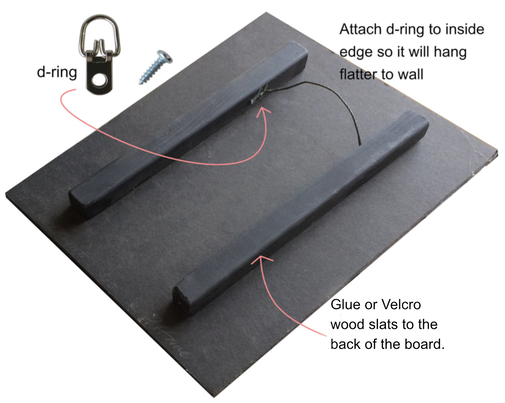
A floating picture frame conveys a sleek and modern aesthetic and creates a sense of depth. It highlights the painting by appearing to suspend it in mid-air, allowing for easy appreciation from all angles. Plus, its minimalist design complements various decor styles. The word “board” and “panel” are synonymous. Some board comes already primed with gesso. If you get board that is not primed, you will need to put three coats of acrylic gesso on it before you begin oil painting on it. Measure the width of the board, mark the midpoint, and draw a straight line from one end to the other, ensuring it passes through the marked midpoint. Draw another line indicating where the top of the board will be. Use a piece of 1"x3", or 1"x 4" board and draw a line down its center. Paint the edges black so they won't show later. Staple of screw a piece of wire to the wood. Mark on each piece of wood where to Velcro will align. Peel off the backing from the stick back Velcro, align it to each board, and firmly press it down to ensure proper adhesion. Press the two boards together. Make sure the wire is at least 1-1/2" lower than the top of the board. This is so the wall hook will not appear when the painting is hung. Painting appears to float off the wall. Notice that you do not see the wire or hanging hardware visible at the top of the painting. From the side, the backing board should not be visible. To hang cradled board, or stretched canvas, attach D-rings to the inside of the support members. This will insure the painting lays flat to the wall,
0 Comments
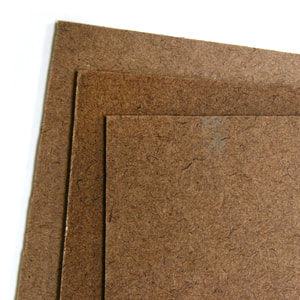
Yes, you can paint a picture on Masonite. Masonite is a type of engineered wood composite made from wood fibers, typically formed into a dense sheet using heat and pressure. It has a smooth, hard surface and is often used as a building material or as a substrate for painting and other artistic applications. First, remove any dirt or debris from the Masonite. Then you can paint on Masonite if you apply three or four coats of gesso first. If the surface of the Masonite is smooth, then use light sandpaper to rough up the surface before applying the gesso. This will allow the gesso to adhere better to the board. If you are intending to produce a super-smooth surface to paint on, then apply each gesso layer thinly with a soft brush. Wait for the gesso to dry completely before painting. Be aware that if you apply the gesso thickly, the ridges of the gesso will appear in your painting if you apply thin layers of oil paint over it. This appearance is neither correct nor incorrect; it’s just an effect the painter needs to be aware of.
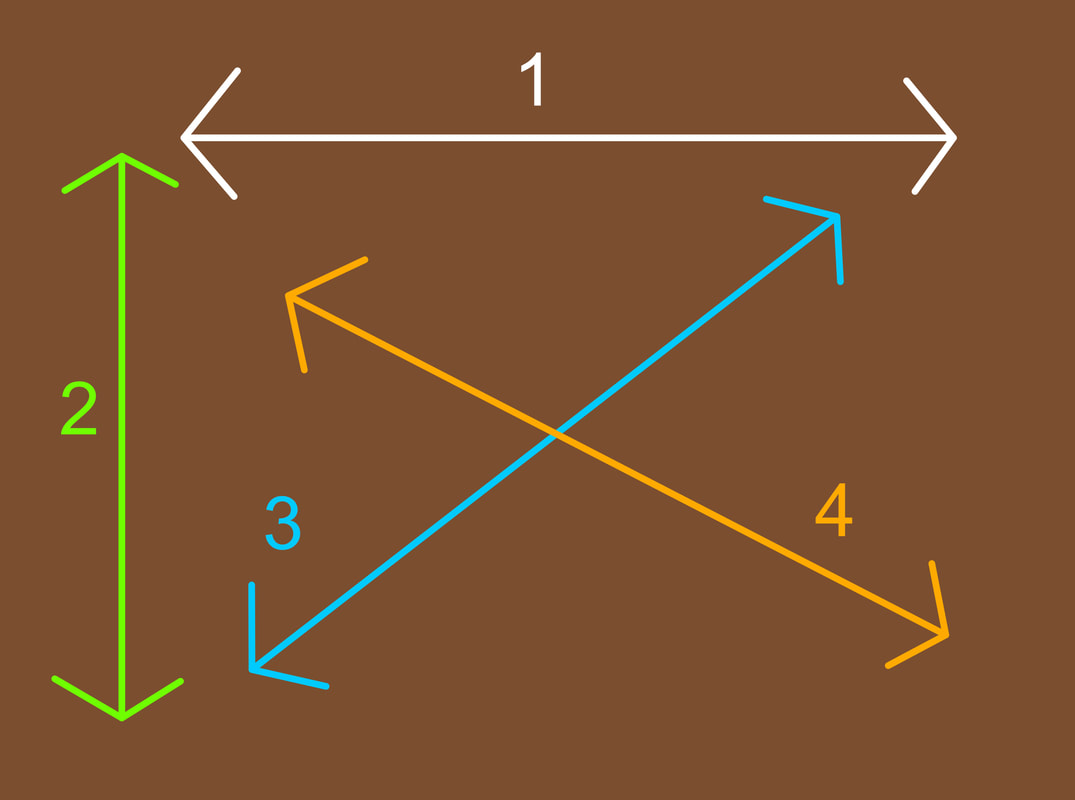
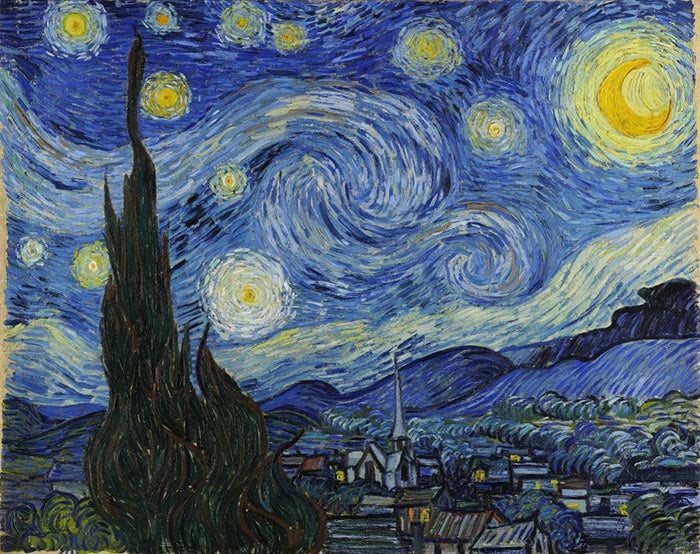
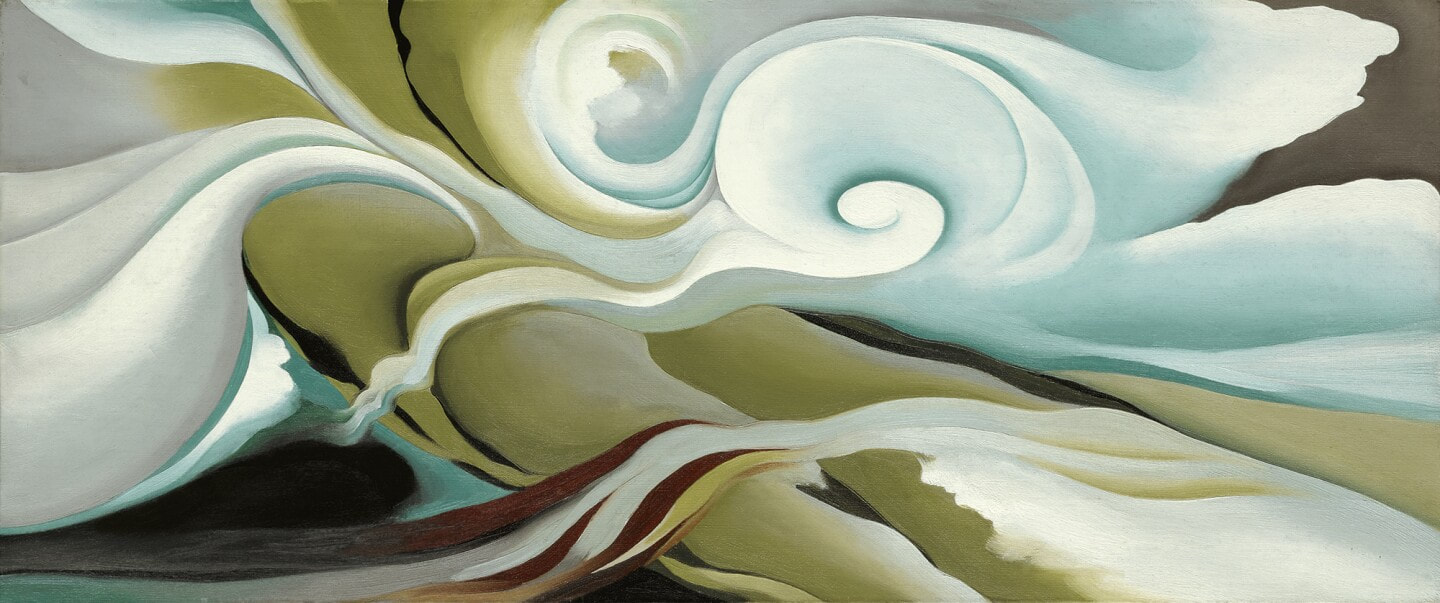
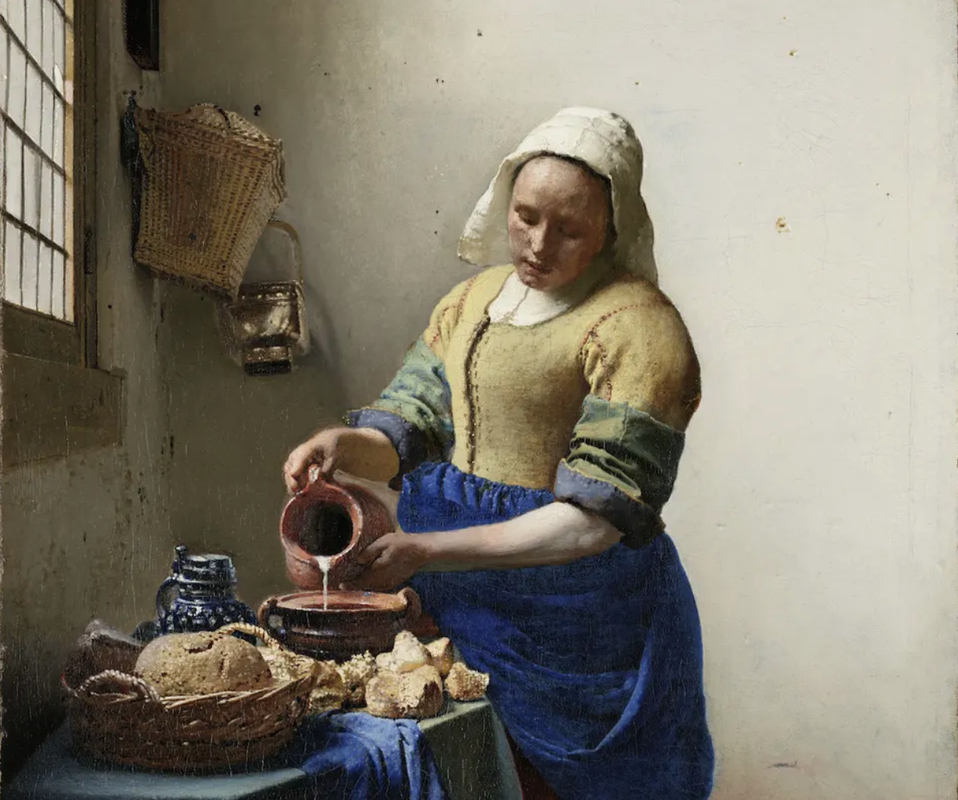
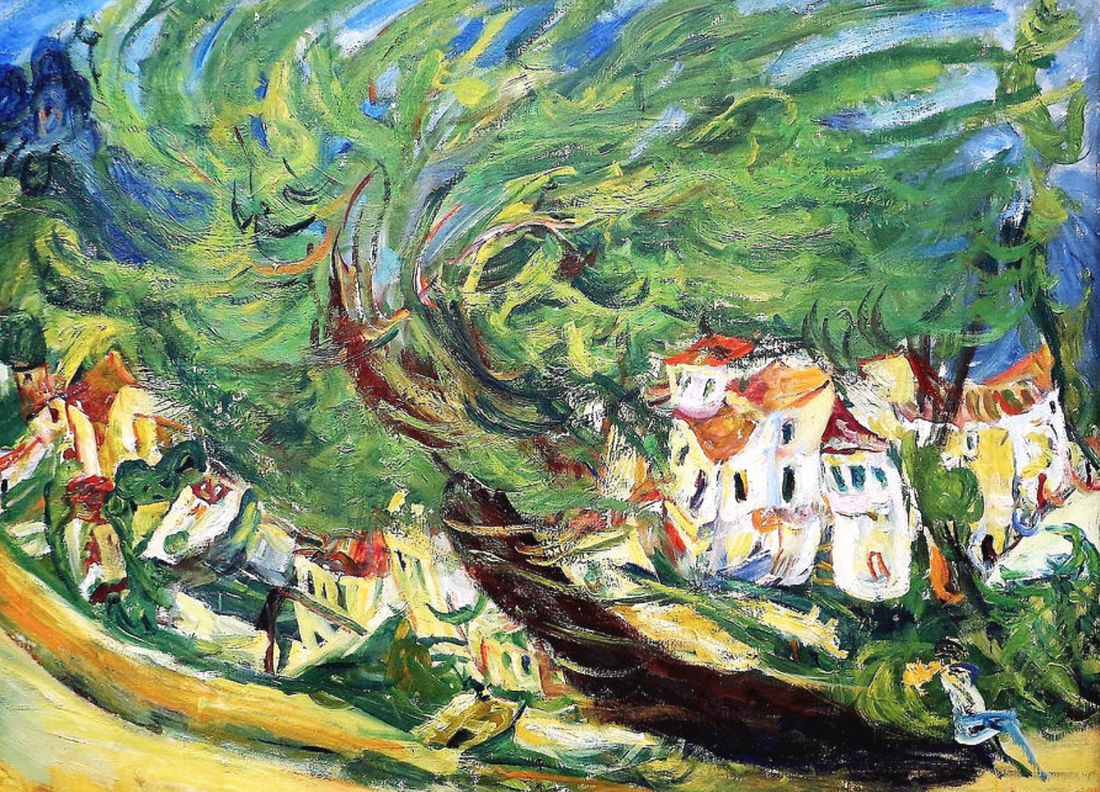
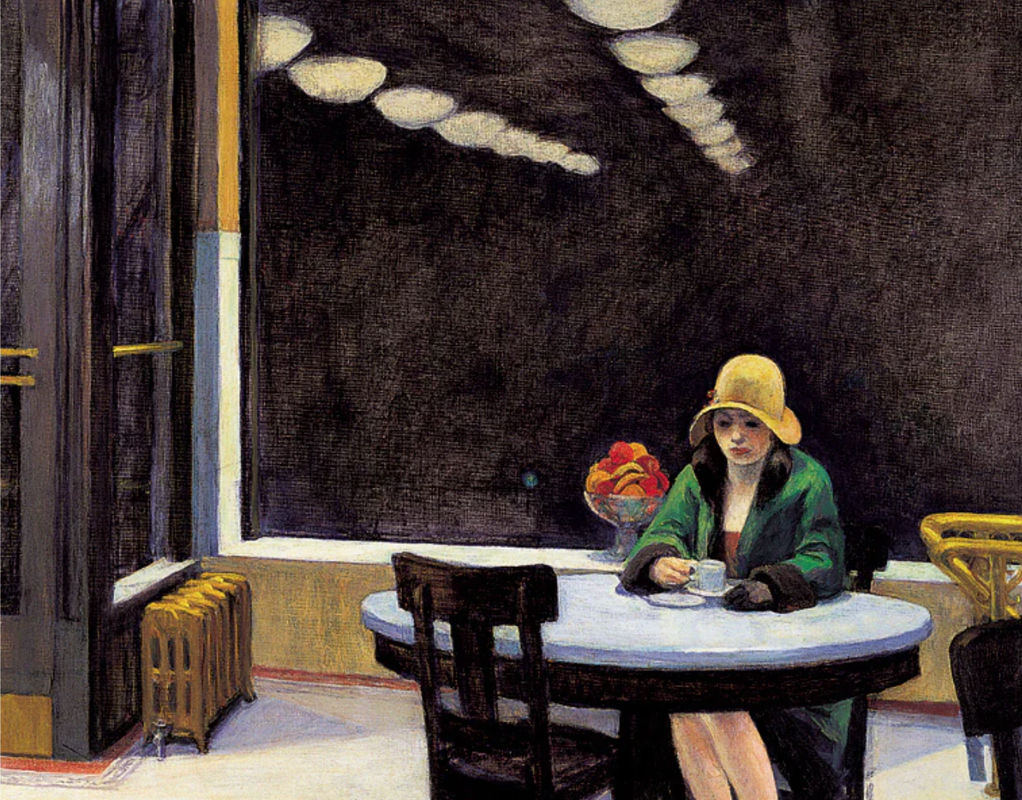
Apply each layer of gesso at different angles. This will result in a smoother gesso surface: (TAT #58) Artists often seek to express motion, or stillness, in their paintings. Here are examples of famous paintings shown side-by-side to compare their differences. Vincent Van Gogh's "A Starry Night" Artists have tried for centuries to capture motion in their paintings. In this painting by Vincent van Gogh, he sought not only to convey the motion of the night sky but also the movement of the entire cosmos! It's a big vision that can be seen in so many of his works. His very application of the paint creates a sense of motion over every inch of his canvases. The motion in "A Starry Night," is depicted through expressive brushwork and a swirling composition. The sky is filled with rhythmic, spiraling brushstrokes that create a sense of movement and turbulence. The swirling patterns are echoed in the cypress tree and the village below, giving the impression that everything in the scene is caught in a dynamic dance. The energetic brushwork and the vibrant colors convey a sense of liveliness and motion, capturing the restless and dynamic nature of the night sky. Compare "A Starry Night" to Georgia O'Keefe's "A Force of Nature": in Georgia O'Keeffe's painting "A Force of Nature," motion is conveyed through dynamic brushstrokes and vibrant colors. The composition captures a sense of swirling energy and movement, with sweeping curves and flowing lines that suggest the power and force of nature. The contrasting hues and overlapping forms create a visual rhythm that engages the viewer and evokes a sense of natural vitality and motion in the scene. Now, going to the entire other end of the spectrum of painting styles, let's compare O'Keeffe's "A Force of Nature" with Vermeer's "Milkmaid". In Vermeer's painting "Milkmaid," a timeless stillness pervades the scene. The composition centers around a milkmaid engrossed in her daily task, frozen in a moment of serene concentration. The stillness is emphasized by the balanced composition, muted colors, and careful rendering of textures and light. The soft play of light on the milkmaid's figure and the simple domestic setting create a sense of quietude and timelessness, evoking a contemplative mood that transcends the passage of time. Now back again to a painting with intense force and power: In Chaim Soutine's painting "Bent Tree," energy and motion come alive through dynamic brushwork and vivid colors. The tree, contorted and twisted, seems to pulsate with life. The forceful and bold brushstrokes convey a sense of movement, as if the tree is caught in a gust of wind. The vibrant hues and exaggerated forms further enhance the feeling of energy, imbuing the painting with a restless vitality. The overall composition exudes a sense of animated motion, evoking a dynamic and expressive interpretation of the natural world. Now, let's return to stillness again, with Edward Hopper's "Automat". In Hopper's painting "Automat," a profound quietude envelops the scene. The solitary figure sits alone at a table in an empty café, engrossed in her thoughts. The muted colors, stark lighting, and absence of any other visible individuals contribute to a sense of stillness and isolation. The woman's introspective gaze and the empty space around her create a serene atmosphere, evoking a feeling of introspection and solitude. The painting captures a moment of quiet contemplation, inviting viewers to reflect on their own inner worlds.
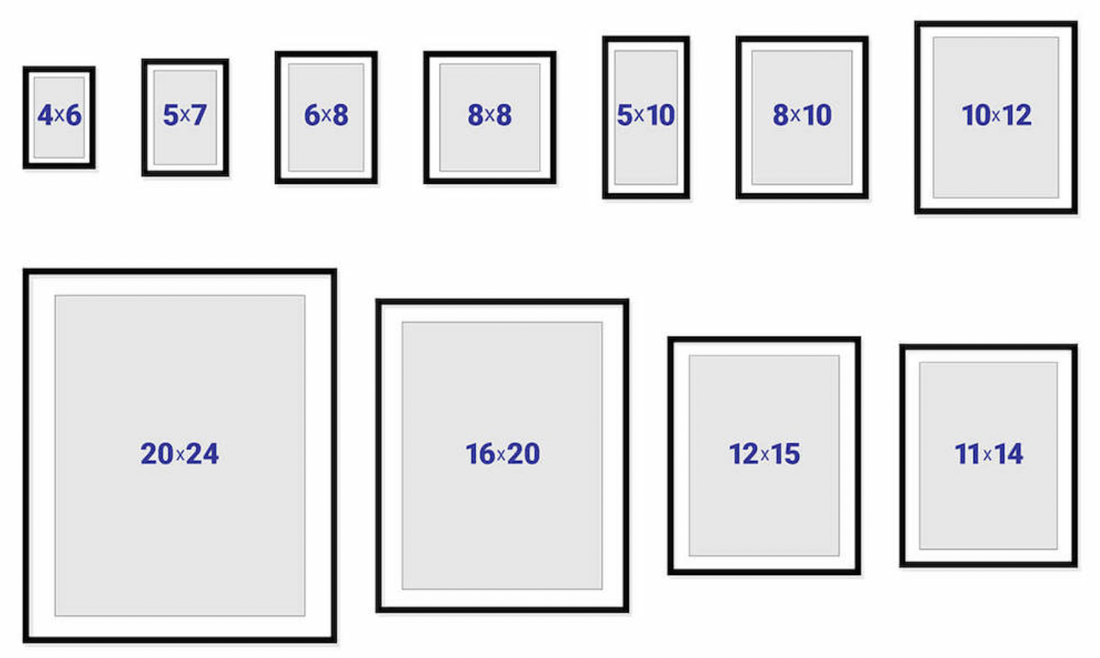
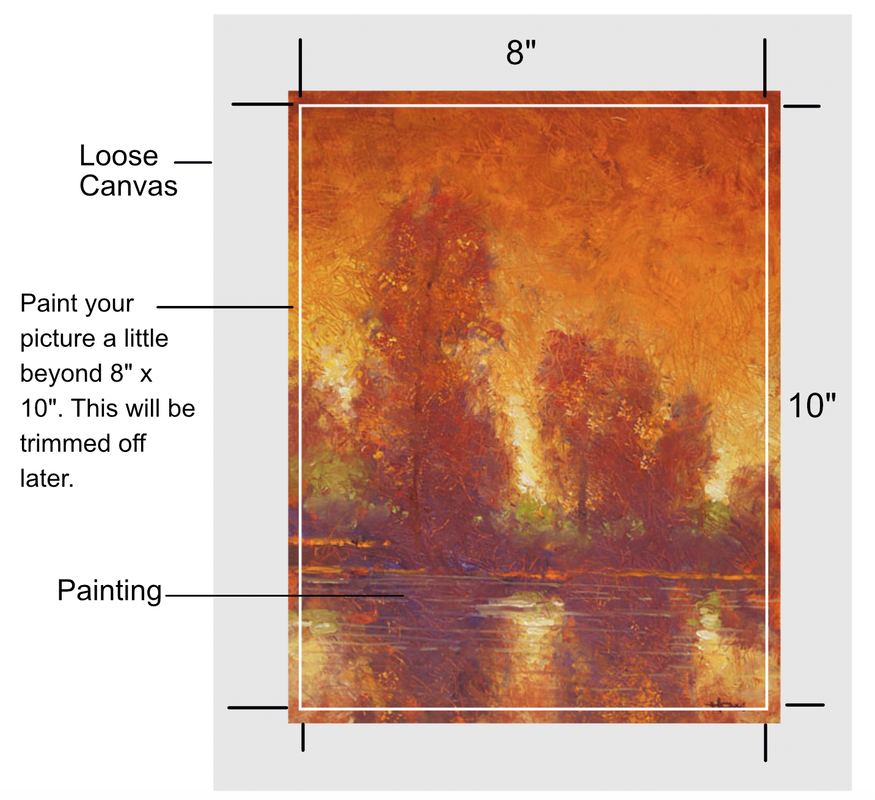
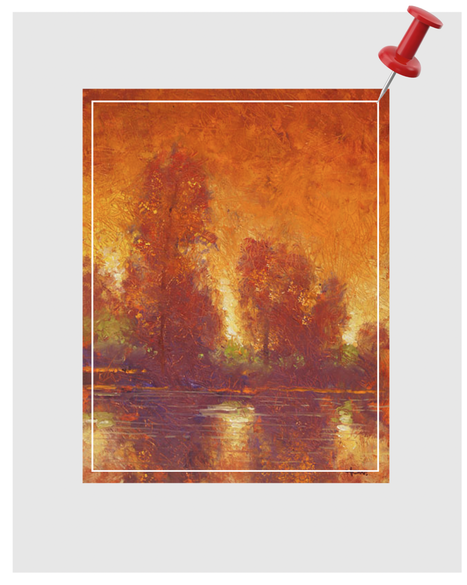
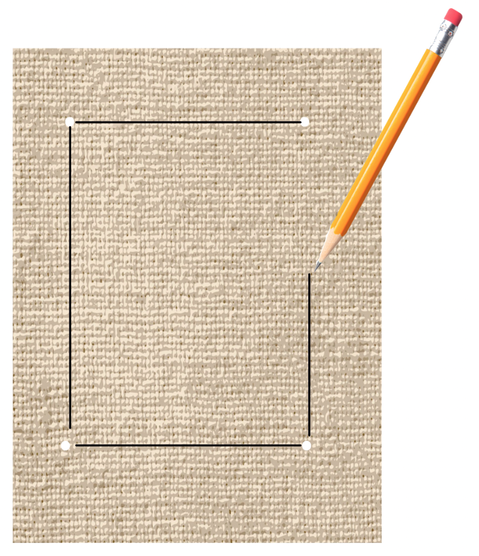
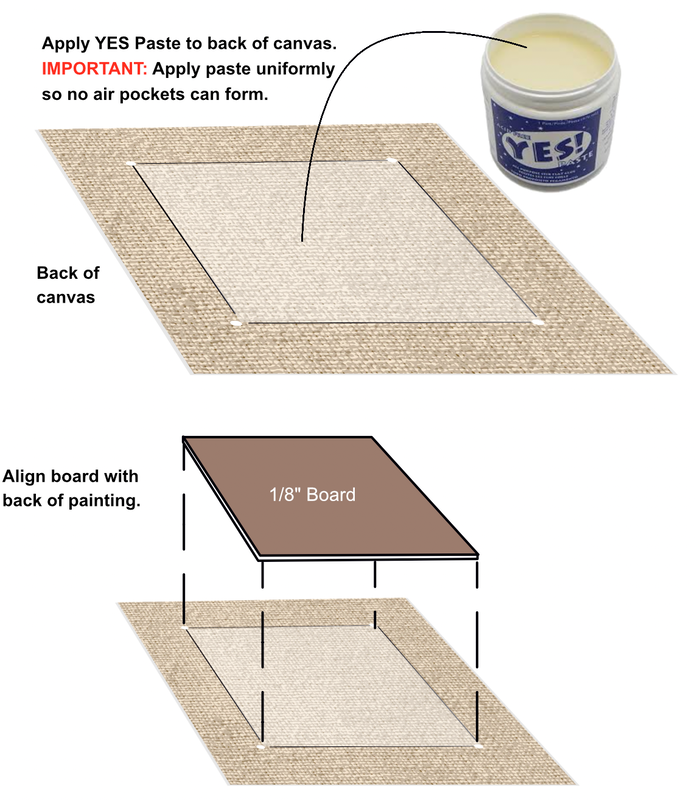
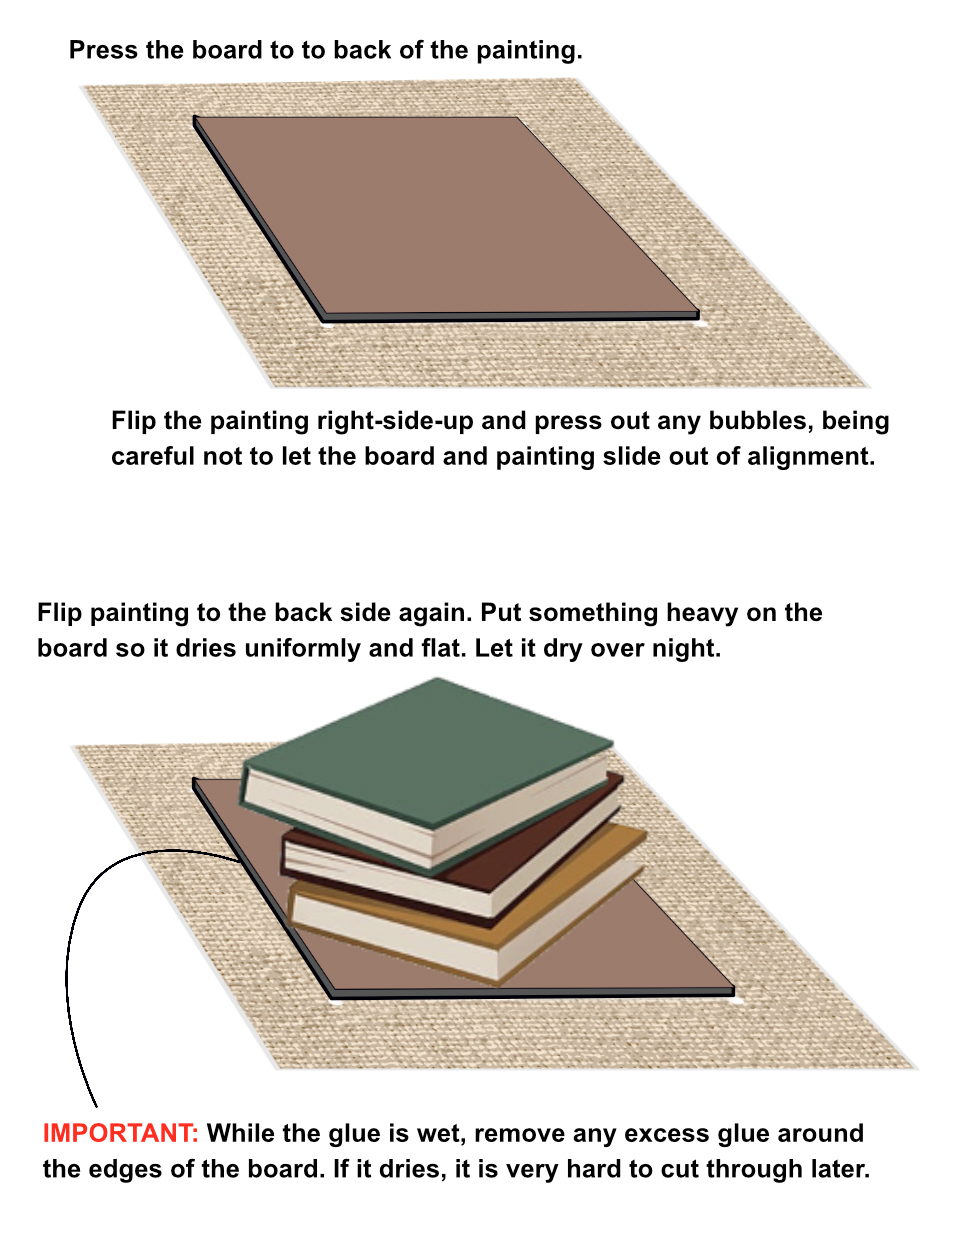
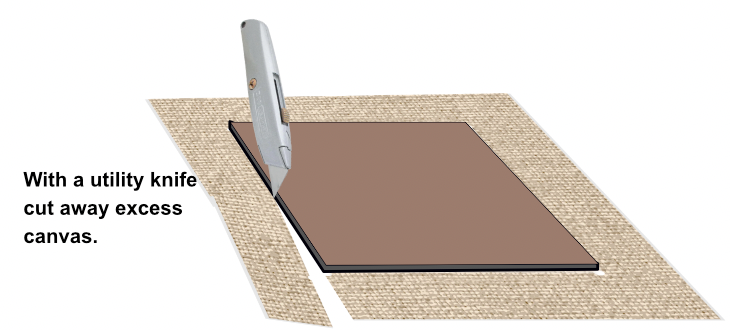
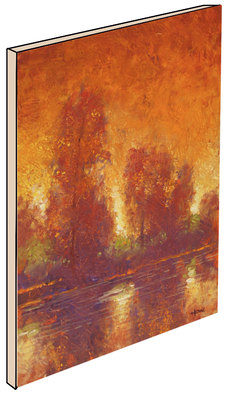
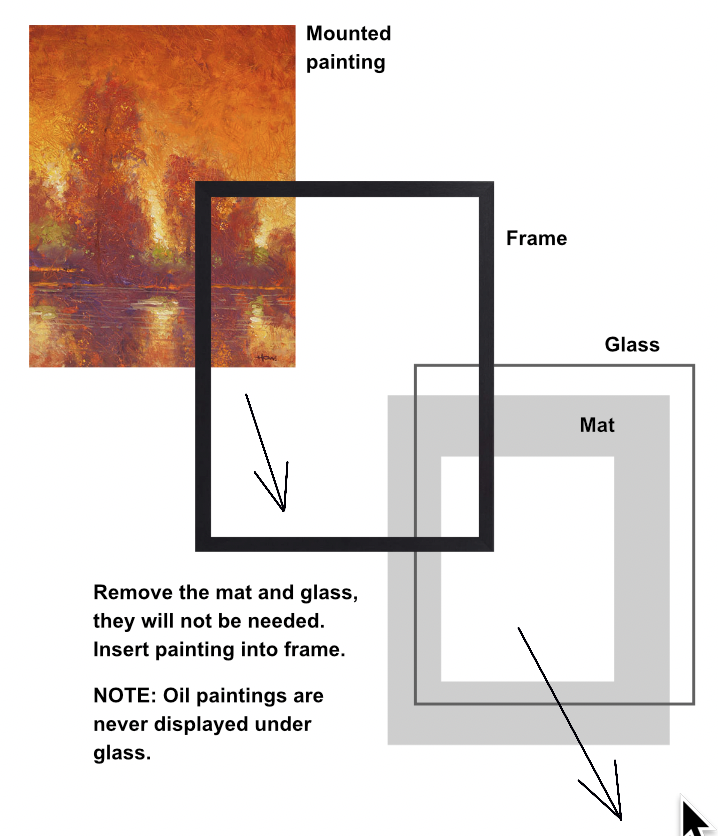
Personally, I enjoy both energetic and quiet paintings. When done well, they both can evoke a delightful non-verbal appeal. Here is how to get your painting on loose canvas ready to display on a wall. First, paint your painting in a common frame size. Then apply YES Paste to the back of your painting and to a board of firm substrate, and press the two together. Let dry, trim, and you are ready to frame. Here are the details: Important to know before you begin your painting: If you paint on loose, primed canvas, make sure your painting is a common size if you intend to also frame it. Here are some common frame sizes, but new sizes are being added all the time, search around. Below I am using the example of an 8"x 10" painting. Notice that the painting is painted on a piece of loose canvas that is larger than the painting era. Then, once your 8" x 10" dimensions are draw on the canvas, notice that the painting is actually painted 1/8" to 1/4" beyond the boundary of the painting's area. This is for trimming later. After you have finished painting your picture and it is dry, use a pushpin to poke a hole in each corner of the 8" x 10" era. (Not the corner of the trim era) Next, turn the painting over to the back side. Find the holes you poked through the canvas. Then, draw a line between the holes. The box drawn will match the boundary of the painting on the other side. Apply 'YES Paste' to the back side. YES Paste is acid-free. So if the board is not acid-free already, the YES Paste will form an acid-free layer. Make sure you push to paste into the fabric so there are no air pockets. You can either cut your own board, or many art supply stores have cut board available. Apply the YES Past to both the canvas and board. Follow the instructions on the jar. Align the board to your boundary line and press the board firmly to the back of the canvas. Make sure the board you use is thin and firm. If it is too thick, it will not fit in a frame. Press the board firmly so it is snuggly in place. Then flip it over to the front and press out any bubbles if there are any. Then gently, turn the painting to the back side again and make sure the board has not slid out of position. If it has, nudge it back into position. Next, place something heavy on the board to keep it pressed for 24 hour. In my example I used books. Important: while the paste is still wet, use a palette knife, or any sharp-edged instrument, and remove any excessive paste that may have squished out with the weight on it. If this paste is allowed to harden, if will be very difficult to trim later. Another important reason to keep the weight on for 24 hours is that YES Paste is water soluble and could warp your painting if it is not held flat until it dries. After the YES Paste has dried completely, using a utility knife, trim off the excessive loose canvas from the board. Your canvas painting is now mounted on board: Cradled Board The same can be done on "cradled" board. Cradled boards are deeper, but the process is the same. Using a Prefabricated Frame If you intend to fit your mounted painting into a prefabricated frame, remove the glass and mat that comes with the frame. They will not be needed. And, in general, you do not put glass over an oil painting. It doesn't need the protection, and the glare of glass makes viewing the painting difficult. Floating the Painting
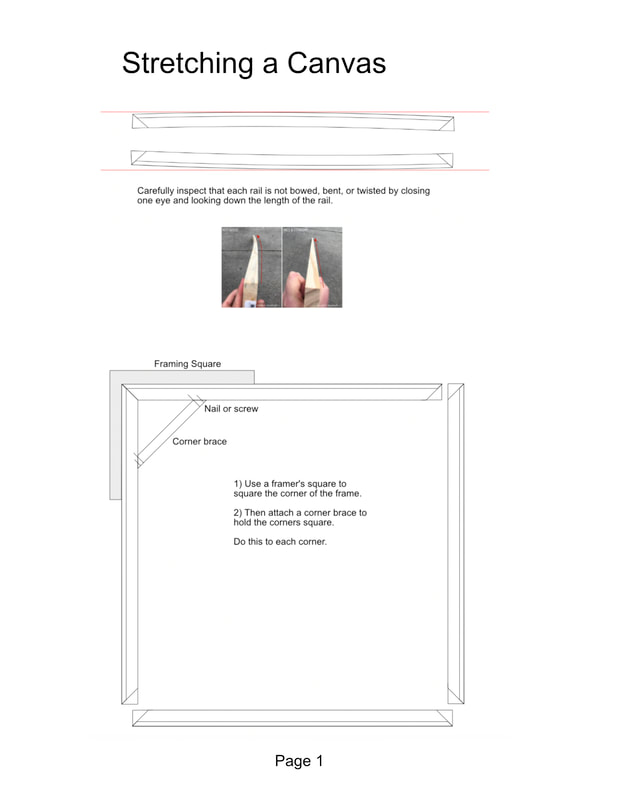
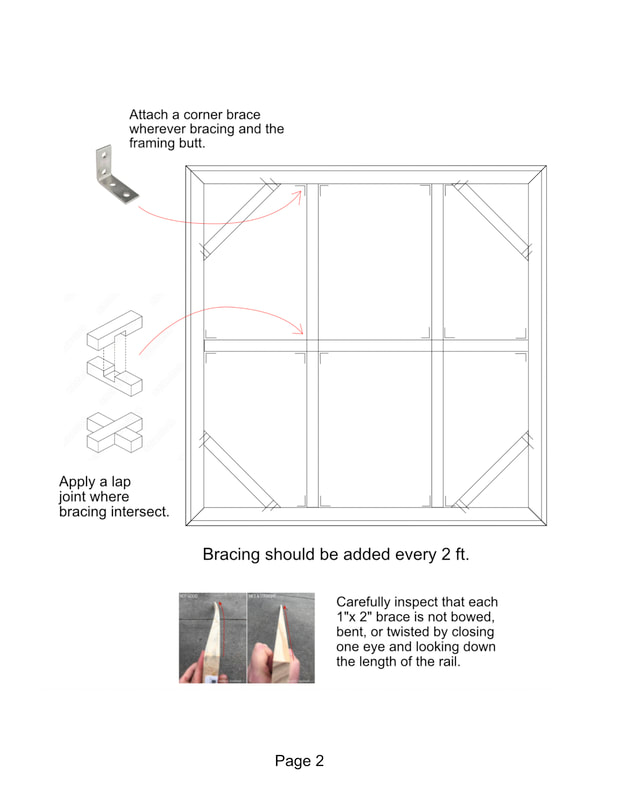
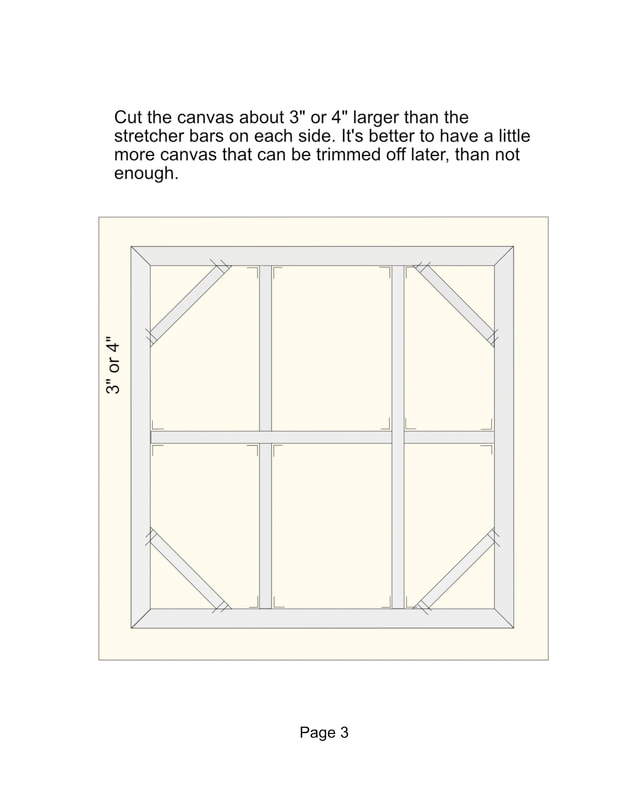
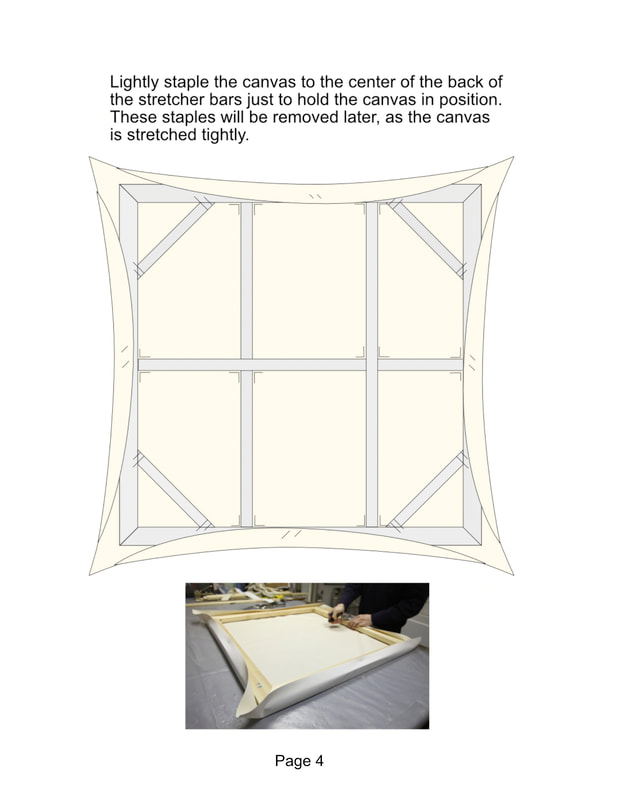
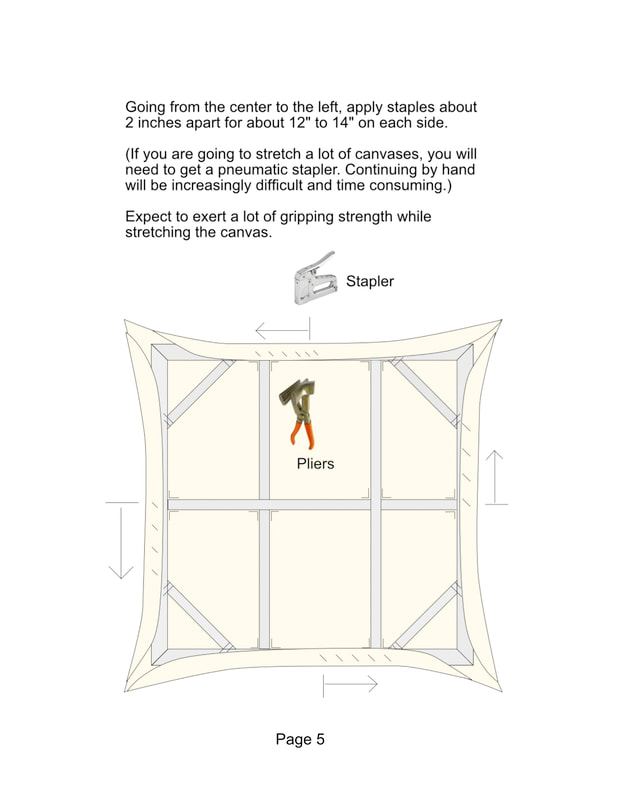
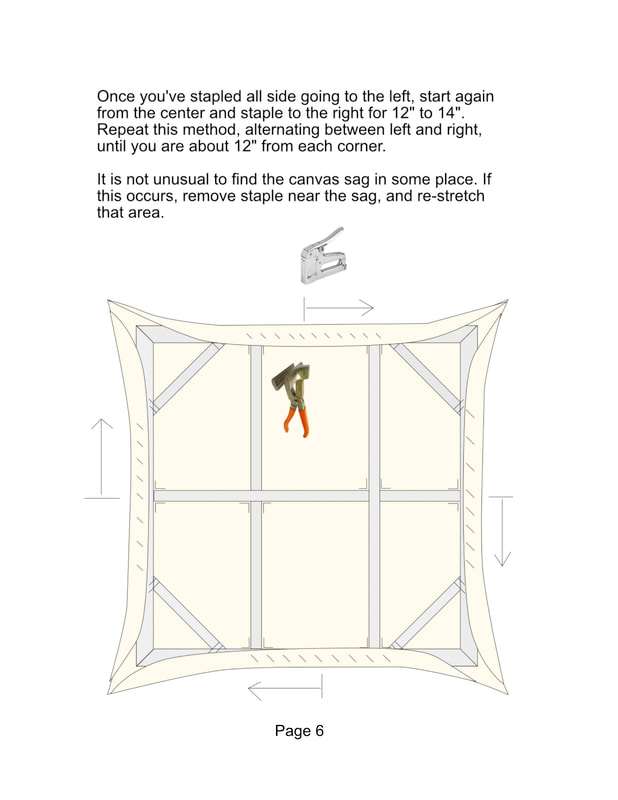
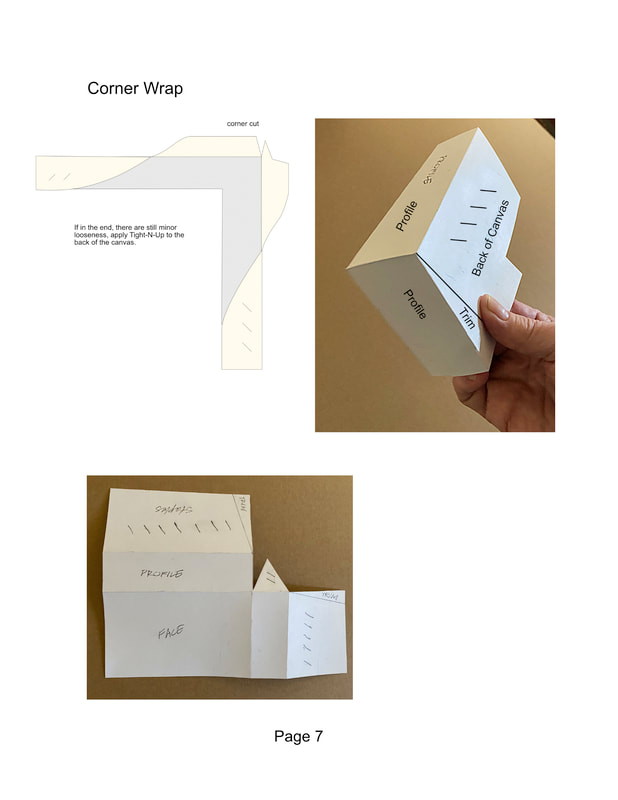
If you wish to hang your mounted painting without a frame, you can make it "float" off the wall: This PDF file is an overview of stretching you own canvas. Stretching your own canvas requires a lot of gripping. If you are planning to stretch many canvases you will need a pneumatic stapler and good tools. This PDF presumes you are stretching a large canvas that would need bracing in the back. Smaller canvases, under 24" x 24" will not need bracing.
Avoid placing your bracing down the vertical center of the canvas, which would interfere with hanging hardware. |
AuthorPatrick Howe Archives
July 2024
Categories
All
|
||||||
|
Copyright © 2023, by Patrick Howe, all rights reserved.
Patrick Howe, Artist, Author and Educator Seattle, WA. Contact: [email protected] |
|

 RSS Feed
